Nikon D3100: A Comprehensive User Guide (Updated 12/24/2025)
Welcome! This detailed guide unlocks the full potential of your Nikon D3100, offering a complete overview of features and functions for optimal photographic experiences.
Today is 12/24/2025 02:42:08 (). This manual assists you in maximizing your product, providing a comprehensive overview of its capabilities.
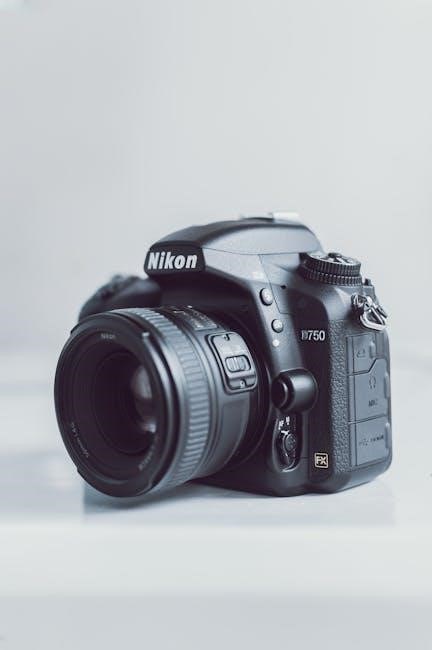
Congratulations on acquiring the Nikon D3100, a powerful and versatile Digital Single-Lens Reflex (DSLR) camera designed for both beginners and enthusiasts! This guide serves as your companion, meticulously crafted to help you navigate its features and unlock your creative potential. The D3100 boasts a 14.2-megapixel DX-format CMOS sensor, delivering exceptional image quality and detail.
Whether you’re a novice stepping into the world of photography or an experienced photographer seeking a reliable and capable camera, the D3100 offers a compelling blend of performance, ease of use, and affordability. This manual, updated as of December 24, 2025, will walk you through every aspect of the camera, from basic operations to advanced techniques.
We’ll explore its controls, shooting modes, and menu system, ensuring you can confidently capture stunning photos and videos. This guide is designed to help you make the most of your new Nikon D3100, providing a comprehensive overview of its capabilities and empowering you to express your vision through photography.
What’s in the Box?
Upon opening your Nikon D3100 package, you should find the following components carefully included. Firstly, the Nikon D3100 camera body itself, the heart of your photographic journey. You’ll also receive the Nikon AF-P DX NIKKOR 18-55mm f/3.5-5.6G VR lens, a versatile kit lens perfect for everyday shooting.
Essential power accessories are included: a battery charger (MH-C30) and a rechargeable Li-ion battery (EN-EL14). Connectivity is covered with a USB cable (UC-E4) for transferring images to your computer. For immediate viewing on a TV, a video cable (EG-D2V) is provided.
Furthermore, you’ll find a strap (AN-DC3) for comfortable carrying, a body cap (BF-1) to protect the sensor when a lens isn’t attached, and a lens cap (LC-1) for lens protection. Finally, the package contains comprehensive documentation: a CD-ROM with Nikon software and the all-important user manual to guide you through every feature.
Key Features and Specifications
The Nikon D3100 boasts a 14.2-megapixel DX-format CMOS sensor, delivering exceptional image quality and detail. It features Full HD 1080p video recording at 24/25/30fps, allowing you to capture stunning videos. A 3.0-inch LCD screen with 230,000-dot resolution provides clear image review and menu navigation.
Its 11-point autofocus system ensures sharp and accurate focusing, while ISO sensitivity ranging from 100 to 3200 (expandable to 12800) enables shooting in various lighting conditions. The D3100 offers a continuous shooting speed of 3 frames per second.
Connectivity options include HDMI for connecting to HDTVs and USB 2.0 for data transfer. It is compatible with SD/SDHC/SDXC memory cards. The camera’s dimensions are approximately 124.5 x 96.5 x 75.5 mm, and it weighs around 475g (body only). Its Guide Mode assists beginners in learning camera settings.

Getting Started with Your D3100
Begin your photographic journey! This section guides you through the initial steps of powering up and preparing your Nikon D3100 for incredible images.
Charging the Battery
Ensuring Power for Your Adventures: Before embarking on your photographic endeavors with the Nikon D3100, it’s crucial to fully charge the battery. Locate the battery charger included in the box and connect it to a standard wall outlet.
Carefully insert the EN-EL9a battery into the charger, ensuring proper alignment – the contacts should match. A charging indicator light will illuminate, typically red, signifying the charging process has begun.
The indicator light will usually change to green once the battery is fully charged. A full charge typically takes approximately 2-3 hours. Avoid interrupting the charging cycle prematurely. Once charged, disconnect the charger from the outlet and remove the battery.
Always use the supplied Nikon charger to prevent damage to the battery.
Inserting the Battery and Memory Card
Powering Up and Expanding Storage: With the battery charged, it’s time to install it and a memory card into your Nikon D3100; Locate the battery compartment door on the bottom of the camera. Release the latch and open the door.
Insert the EN-EL9a battery, ensuring the contacts align correctly. Press down gently until it clicks into place. Next, locate the memory card slot, typically alongside the battery compartment.
The D3100 supports SD, SDHC, and SDXC memory cards. Insert the card, label side up, into the slot until it clicks. Close both compartment doors securely.
Properly seated, the camera will recognize both the battery and memory card, allowing you to begin capturing images. Ensure the card is compatible for optimal performance.
Powering On and Initial Setup
Bringing Your D3100 to Life: With the battery and memory card securely installed, it’s time to power on your Nikon D3100 and complete the initial setup. Locate the power switch, typically a slider around the shutter button. Move it to the ‘ON’ position.
The camera will display the Nikon logo, followed by a language selection screen. Use the directional pad to choose your preferred language and press the ‘OK’ button. Next, you’ll be prompted to set the date and time.
Use the directional pad to adjust the values and press ‘OK’ to confirm each setting. The camera may also ask you to configure shooting settings or select a picture control. Follow the on-screen prompts to personalize your D3100.
Once completed, your camera is ready for its first shot!

Understanding the Camera Body & Controls
Explore the D3100’s layout! This section details the functions of front, rear, and top panel controls, alongside a comprehensive explanation of the versatile Mode Dial.
Front Panel Controls
The Nikon D3100’s front panel houses essential controls for lens operation and depth-of-field preview. You’ll find the lens release button, crucial for quickly changing lenses, allowing for versatility in your photographic pursuits.
Adjacent to this is the depth-of-field preview button; pressing it stops down the lens to the selected aperture, visually demonstrating the resulting depth of field – a valuable tool for landscape or portrait photography.
Furthermore, the front panel incorporates the autofocus-assist illuminator, which projects a pattern to aid focusing in low-light conditions. This ensures sharp images even when ambient light is insufficient. Understanding these controls is fundamental to mastering manual focusing and achieving desired photographic effects.
Proper utilization of these features unlocks creative potential and enhances overall image quality.
Rear Panel Controls
The rear panel of the Nikon D3100 is the command center for navigating menus, reviewing images, and adjusting camera settings. Dominated by the bright 3.0-inch LCD screen, it provides a clear view for composition and playback.
Surrounding the screen are numerous buttons: the directional pad facilitates menu navigation, while the ‘OK’ button confirms selections. The ‘i-button’ offers quick access to frequently used settings.

Dedicated buttons control image playback, info display, and white balance adjustments. The ‘AF-ON’ button enables autofocus activation independent of the shutter release, useful for back-button focusing techniques.
Mastering these controls allows for efficient operation and customization of the camera to suit individual shooting preferences, ultimately enhancing the photographic experience.
Top Panel Controls
The Nikon D3100’s top panel houses essential controls for immediate access during shooting. Centrally located is the Mode Dial, allowing swift selection between Auto, Scene, and Manual shooting modes. Adjacent to it resides the On/Off switch, integrated with the shutter button for efficient operation.
The control dial enables adjustments to settings like aperture, shutter speed, and ISO, depending on the selected shooting mode. A dedicated button activates exposure compensation, allowing for quick brightness adjustments.
The flash release button provides manual control over the built-in flash, while the depth-of-field preview button simulates the image’s depth of field at the selected aperture. Understanding these controls is crucial for responsive and intuitive camera operation.
Mode Dial Explained
The Nikon D3100’s Mode Dial is your gateway to different shooting experiences. The ‘Auto’ mode simplifies photography, letting the camera handle all settings. ‘Scene’ mode offers presets for portraits, landscapes, sports, and more, optimizing settings for specific situations.
‘P’ (Program Auto) allows some control over ISO, white balance, and picture control while the camera manages aperture and shutter speed. ‘S’ (Shutter Priority) lets you set the shutter speed for motion control, while ‘A’ (Aperture Priority) controls depth of field.
‘M’ (Manual) grants full control over both aperture and shutter speed. Finally, there’s a flash setting and movie recording mode. Mastering the Mode Dial unlocks creative potential and allows for tailored image capture.
Photography Basics with the D3100
Begin your photographic journey! This section explores fundamental concepts like exposure, focus, metering, and shooting modes, empowering you to capture stunning images.
Understanding Exposure: Aperture, Shutter Speed, and ISO
Exposure is key to well-lit photographs; It’s the amount of light reaching the camera sensor, controlled by three settings: aperture, shutter speed, and ISO.
Aperture, measured in f-stops (e.g., f/2.8, f/8), controls the lens opening size, impacting depth of field – how much of the image is in focus. Lower f-numbers create shallow depth of field, ideal for portraits, while higher f-numbers yield greater depth, suitable for landscapes.
Shutter speed, measured in seconds or fractions of a second (e.g., 1/1000s, 1s), determines how long the sensor is exposed to light. Faster shutter speeds freeze motion, while slower speeds allow more light in, potentially causing motion blur.
ISO measures the sensor’s sensitivity to light; Lower ISO values (e.g., 100) produce cleaner images but require more light. Higher ISO values (e.g., 3200) are useful in low light but can introduce noise or grain.
Mastering these three elements allows for creative control and optimal image quality.
Focusing Modes: Auto-Focus Area Modes
The Nikon D3100 offers several Auto-Focus Area Modes to suit various shooting scenarios, ensuring sharp and clear images. Understanding these modes is crucial for achieving desired focus.
Single-point AF allows you to select a specific focus point, ideal for stationary subjects. Dynamic-area AF uses the selected focus point and surrounding points to track moving subjects. Auto-area AF lets the camera automatically select focus points, suitable for general photography.
Face-priority AF detects and focuses on faces, perfect for portraits. Tracking AF locks onto a subject and follows its movement, excellent for sports or wildlife. Experiment with these modes to determine which best suits your subject and shooting style.
Properly selecting the AF area mode significantly impacts image sharpness and overall photographic success.
Metering Modes: Choosing the Right Measurement
The Nikon D3100 provides three primary metering modes to accurately measure light and determine optimal exposure settings. Selecting the correct mode is vital for well-exposed photographs in diverse lighting conditions.
Matrix metering analyzes the entire scene, offering a balanced exposure suitable for most situations. Center-weighted metering prioritizes the center of the frame, ideal for portraits or subjects in the middle. Spot metering measures light from a very small area, useful for challenging lighting or specific subject emphasis.
Understanding how each mode interprets light allows you to override the camera’s settings when necessary. For example, use spot metering on a dark subject against a bright background. Experimentation is key to mastering exposure control.
Choosing the right metering mode ensures consistently accurate and visually appealing results.
Shooting Modes: Auto, Scene, and Manual
The Nikon D3100 offers a versatile range of shooting modes to accommodate various skill levels and photographic scenarios. Auto mode simplifies operation, letting the camera handle all settings for effortless snapshots. This is perfect for beginners or quick captures.
Scene modes provide pre-configured settings optimized for specific subjects like portraits, landscapes, sports, or night scenes. These modes enhance image quality without requiring manual adjustments. Manual mode grants complete control over aperture, shutter speed, and ISO, allowing experienced photographers to fine-tune exposure and creative effects.
Experimenting with each mode unlocks the D3100’s full potential. Start with Auto, then explore Scene modes, and finally, master Manual mode for ultimate creative freedom.
Advanced Photography Techniques
Elevate your skills! Explore techniques like Live View composition, white balance adjustments, Picture Control settings, and RAW versus JPEG shooting for superior results.
Using Live View for Precise Composition
Mastering Live View on your Nikon D3100 unlocks a world of compositional control. This feature displays the image directly on the LCD screen, allowing for incredibly precise framing and focus, especially in challenging situations. Unlike shooting through the viewfinder, Live View lets you see exactly what the sensor sees.
To activate Live View, simply switch to the designated mode on the Mode Dial. Utilize the zoom function for critical focus confirmation, ensuring sharpness where it matters most. The grid display option assists with the rule of thirds and maintaining level horizons.
Remember that prolonged Live View usage can impact battery life and potentially cause the camera to warm up. However, for static subjects demanding meticulous composition, it’s an invaluable tool. Experiment with different settings and discover how Live View can transform your photography!
Working with White Balance
Achieving accurate colors is crucial for compelling photography, and the Nikon D3100’s White Balance settings are key. White balance corrects color casts caused by different lighting conditions, ensuring whites appear white and colors are rendered naturally.
The D3100 offers several preset options – Auto, Incandescent, Fluorescent, Direct Sunlight, Flash, Cloudy, and Shade. ‘Auto’ is a good starting point, but for consistent results, especially in challenging light, manual selection is recommended. You can also use the custom white balance feature to precisely calibrate for specific lighting scenarios.
Experiment with different settings to understand their impact on your images. Incorrect white balance can create unwanted color tints, while accurate settings deliver vibrant and realistic results. Don’t be afraid to adjust in post-processing if needed!
Understanding Picture Control Settings
Picture Control settings on the Nikon D3100 allow you to customize the look of your images directly within the camera. These presets influence sharpness, contrast, brightness, saturation, and hue, offering creative control without post-processing.
The D3100 provides Standard, Neutral, Vivid, Monochrome, Portrait, Landscape, and Flat options. ‘Standard’ is a versatile all-purpose setting. ‘Vivid’ boosts colors for eye-catching results, while ‘Monochrome’ creates striking black and white images. ‘Portrait’ softens skin tones, and ‘Landscape’ enhances blues and greens.
You can further refine these presets by adjusting individual parameters. Saving custom Picture Controls allows you to quickly apply your preferred style to future shoots. Experiment to discover the settings that best suit your photographic vision!
Shooting in RAW vs. JPEG
RAW and JPEG are distinct image file formats with different characteristics. JPEG files are compressed, resulting in smaller file sizes but some loss of image data. They are ready to share directly from the camera, requiring minimal editing.
RAW files, conversely, contain all the data captured by the sensor, offering maximum flexibility in post-processing. This allows for extensive adjustments to exposure, white balance, and other settings without significant quality degradation. However, RAW files are considerably larger than JPEGs.
For critical shots where maximum editing control is desired, RAW is recommended. For everyday photography where convenience and file size are priorities, JPEG is a suitable choice. The Nikon D3100 allows you to shoot in both formats simultaneously.
Navigating the Menu System
Explore the D3100’s intuitive menu for customizing settings, playback options, and overall camera setup, unlocking its full potential for personalized photography.
Customizing Menu Settings
Personalize your Nikon D3100 experience by diving into the extensive menu settings. The menu is logically organized into categories, allowing for easy navigation and adjustment of various camera functions. You can tailor image quality settings, such as JPEG compression levels and RAW recording options, to suit your specific needs and preferences.
Explore options for auto-focus behavior, metering sensitivity, and white balance control. Customize button assignments for quicker access to frequently used features. Adjust display settings, including brightness, information overlay, and viewfinder gridlines. Don’t forget to explore the setup menu for language selection, date/time adjustments, and firmware version checks.
Remember to save your customized settings to a user preset for quick recall. Experiment with different combinations to discover the optimal configuration for your shooting style and creative vision. This level of customization empowers you to truly make the D3100 your own.
Playback Menu Options
Review and refine your images using the D3100’s versatile playback menu. This menu provides a suite of tools for examining your photos and videos immediately after capture. You can zoom in on images to check for sharpness, display shooting information like aperture and shutter speed, and utilize histogram analysis to assess exposure accuracy.
The playback menu also offers options for deleting unwanted images, protecting important photos from accidental deletion, and creating slideshows for convenient viewing. Rotate images, apply quick retouch effects, and even rate your photos to streamline your workflow.
Explore features like D-Lighting, which can brighten dark areas in your images, and vignette control to adjust the brightness around the image edges. Utilize the playback menu to learn from your shots and improve your photographic skills.
Setup Menu Options
Customize your D3100 to perfectly match your shooting style with the extensive Setup menu. This menu allows you to personalize camera settings, ensuring a seamless and efficient photographic experience. Adjust the date and time, format memory cards, and choose your preferred language.
Configure the LCD screen brightness and auto-off settings to conserve battery life. Customize button functions for quicker access to frequently used features. Within the Setup menu, you can also reset the camera to its factory default settings, effectively clearing all custom configurations.
Manage firmware updates to keep your D3100 operating at peak performance. Adjust the USB connection method and configure video output settings. Explore these options to tailor your camera and unlock its full potential.
Maintenance and Troubleshooting
Keep your Nikon D3100 performing optimally with regular cleaning and proactive troubleshooting. This section provides guidance on sensor care and resolving common issues.
Cleaning the Sensor
Maintaining a pristine sensor is crucial for image quality with your Nikon D3100. Dust accumulation can lead to unwanted spots in your photographs, especially noticeable in bright, evenly lit scenes. Regularly inspect your sensor using the camera’s built-in sensor cleaning function, accessible through the setup menu.
For more stubborn dust particles, consider using a dedicated sensor cleaning kit. Caution: Improper cleaning can damage the sensor. Always follow the kit’s instructions meticulously. Ensure you are working in a clean, dust-free environment. Before attempting manual cleaning, fully charge the battery to prevent interruption during the process. Avoid touching the sensor surface directly; utilize the provided swabs and cleaning solution. If you are uncomfortable performing sensor cleaning yourself, consult a qualified camera repair technician.
Remember preventative measures, like changing lenses in clean environments, can minimize dust buildup.
Common Problems and Solutions
Encountering issues with your Nikon D3100 is normal. A frequent problem is the camera not powering on – ensure the battery is fully charged and correctly inserted. If the LCD screen displays errors, try resetting the camera to factory defaults via the setup menu. Blurry images often stem from incorrect focusing; review focusing modes and ensure adequate light.
Memory card errors can be resolved by reformatting the card within the camera (back up data first!). Slow autofocus might indicate insufficient light or a subject outside the autofocus area. If the camera freezes, remove the battery for a few minutes, then reinsert it. Important: Regularly update the camera’s firmware to address potential bugs and improve performance. If problems persist, consult Nikon’s support website or a qualified technician.
Preventative maintenance and careful handling minimize potential issues.
Firmware Updates
Keeping your Nikon D3100’s firmware current is crucial for optimal performance and compatibility. Nikon periodically releases firmware updates to address bugs, enhance features, and improve overall camera functionality. To check for updates, visit the official Nikon support website and navigate to the download section for the D3100 model.
The update process typically involves downloading the firmware file to a formatted memory card, inserting the card into the camera, and following the on-screen instructions. Important: Ensure the camera battery is fully charged, and do not interrupt the update process, as this could damage the camera. Regularly checking for updates—even if you aren’t experiencing issues—is a proactive step towards maintaining a smooth and reliable shooting experience.
Firmware updates are free and readily available.
Leave a Reply