
The Sony DSC-H300 is a versatile camera, offering a 35x optical zoom and 20.1MP sensor. Enabling DSC on compatible displays enhances visual fidelity.
What is the Sony DSC-H300?
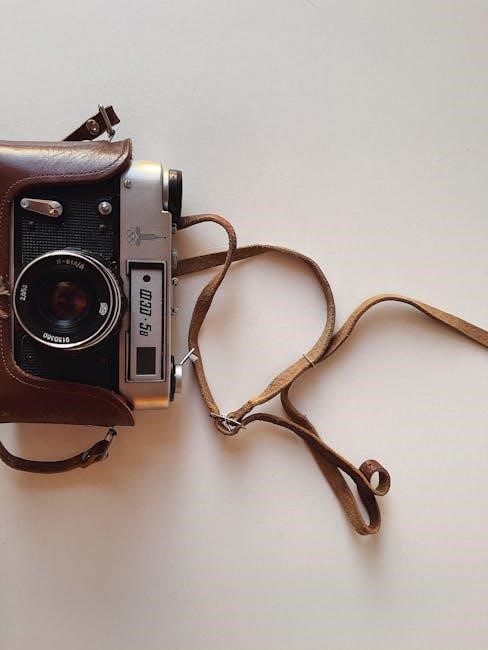
The Sony DSC-H300 is a bridge camera designed for users seeking a balance between simplicity and advanced features. It boasts a powerful 35x optical zoom lens, allowing for detailed shots from a distance. Featuring a 20.1-megapixel CCD sensor, it captures vibrant images. Understanding DSC (Display Stream Compression) is crucial for optimal display performance with modern monitors, especially when utilizing HDMI 2.1 or DP 1.4 connections. The camera’s manual details these settings, alongside focusing modes and image quality adjustments.
Key Features and Specifications
The DSC-H300 features a 20.1MP CCD sensor, 35x optical zoom, and 720p HD video recording. It includes SteadyShot image stabilization for sharper images, even at maximum zoom. The manual details its scene selection modes and creative effects. Display Stream Compression (DSC) enhances bandwidth efficiency for high-resolution displays. Key specs include an ISO range of 80-3200 and compatibility with HDMI and DP connections. Understanding DSC’s role with HDMI 2.1 and DP 1.4 is vital for optimal visual output.

Getting Started with Your DSC-H300
Initial setup involves charging the battery and inserting a memory card, as detailed in the manual. Confirming DSC compatibility ensures optimal display performance.
Unboxing and Initial Setup
Carefully unpack your Sony DSC-H300, verifying all included components: camera body, battery, AC adapter, and manual. Before first use, thoroughly review the provided documentation for safety precautions and operational guidance. Initial setup requires inserting the battery correctly and formatting a compatible memory card.
Ensure DSC (Display Stream Compression) compatibility is checked on your display device for optimal image transmission. The manual details how to navigate the camera’s menus and customize settings to your preferences. Familiarize yourself with button locations and functions for a seamless user experience.
Charging the Battery
To charge the DSC-H300’s battery, connect the AC adapter to the camera and a power outlet. The charging indicator light will illuminate, typically red during charging and turning off or changing color when complete. Initial charging may take several hours; consult the manual for specific times.
Avoid interrupting the charging process. While charging, ensure the camera is in a well-ventilated area. DSC compatibility on your display won’t affect battery charging. A fully charged battery provides ample shooting time, detailed in the user manual.
Inserting Memory Card
The DSC-H300 utilizes memory cards for storing photos and videos. Locate the memory card slot, typically on the side of the camera. Gently insert a compatible card (SD card recommended) into the slot until it clicks into place. Avoid forcing the card.
To remove the card, gently push it in once to eject it. DSC display settings won’t impact card functionality. Always handle cards carefully to prevent data corruption. Refer to the manual for supported card types and capacities.
Understanding the Camera Interface
The DSC-H300’s interface features buttons for shooting, menu navigation, and zoom control. The LCD screen displays settings and images, aiding user operation.
Buttons and Controls Overview
The Sony DSC-H300 boasts a user-friendly control layout. The power button initiates camera operation, while the shutter button captures photos. A zoom lever facilitates framing, and a mode dial selects shooting modes like Auto, Program Auto, and Scene Selection.
Dedicated buttons access the menu, image playback, and movie recording. The directional pad navigates menus, and a central ‘Set’ button confirms selections. Understanding these controls is crucial for efficient operation and exploring the camera’s full potential. Familiarize yourself with their placement for seamless shooting.
Menu Navigation
The DSC-H300’s menu system is accessed via the dedicated ‘Menu’ button. Navigation utilizes the directional pad – up, down, left, and right – to scroll through options. Pressing the central ‘Set’ button selects a highlighted menu item.
Menus are categorized into tabs: Shooting, Playback, Setup. Within each, you’ll find settings for image quality, ISO, white balance, and various camera functions. The menu structure is logical, allowing for easy customization. Remember to confirm changes before exiting each menu screen.
Viewfinder and LCD Screen
The DSC-H300 features both an electronic viewfinder (EVF) and a 3.0-inch LCD screen. The EVF is useful for composing shots in bright sunlight, offering a clear view even when the LCD is washed out. The LCD screen provides a larger, more detailed view for reviewing images and navigating menus.
You can toggle between the EVF and LCD using the viewfinder/LCD button. Adjusting the LCD brightness is possible through the Setup menu, optimizing visibility for different lighting conditions.

Shooting Modes Explained
The DSC-H300 offers diverse shooting modes, including Auto, Program Auto, Scene Selection, and Movie Mode, catering to various skill levels and photographic needs.
Auto Mode
Auto Mode on the Sony DSC-H300 simplifies photography, automatically adjusting settings for optimal results. The camera intelligently analyzes the scene, selecting appropriate exposure, focus, and white balance. This mode is ideal for beginners or quick snapshots, requiring minimal user input. It prioritizes ease of use, ensuring well-exposed images in various conditions. While convenient, Auto Mode offers limited creative control compared to manual or semi-automatic modes. Users can still review and adjust images post-capture, but the initial settings are determined by the camera’s internal algorithms, aiming for a balanced and pleasing outcome.
Program Auto Mode
Program Auto (P) Mode on the DSC-H300 offers a balance between automatic convenience and user control. The camera sets the shutter speed and aperture for optimal exposure, but allows adjustments to settings like ISO, white balance, and flash. This mode is suited for photographers wanting more influence than full Auto, yet still benefiting from automatic exposure calculations. It’s a stepping stone towards manual control, providing a learning environment. Users can ‘shift’ the program, subtly altering aperture and shutter speed combinations while maintaining proper exposure, offering creative flexibility.
Scene Selection Mode
Scene Selection Mode on the DSC-H300 optimizes camera settings for specific shooting scenarios. Options include Portrait, Landscape, Night Scene, Sports, and Snow, among others. Selecting the appropriate scene pre-configures settings like aperture, shutter speed, and ISO for best results in that environment. This simplifies photography, eliminating the need for manual adjustments. For example, ‘Night Scene’ increases ISO and uses a slower shutter speed to capture more light. It’s ideal for beginners or situations demanding quick, optimized results.
Movie Mode
Movie Mode on the DSC-H300 allows recording videos in various resolutions, typically up to 720p. Access this mode via the camera’s mode dial. Before recording, ensure sufficient battery life and available storage on your memory card. Utilize the zoom function carefully during recording to avoid abrupt changes. The optical zoom is preferable to digital zoom for maintaining image quality. Consider using the SteadyShot image stabilization to minimize camera shake. Review recorded videos promptly to confirm satisfactory results and adjust settings as needed.

Focusing and Image Settings
Adjust focus modes (single, continuous, manual) and image quality settings (resolution, compression) within the camera’s menu. Optimize ISO and white balance for ideal results.
Focus Modes (Single, Continuous, Manual)
The DSC-H300 offers three distinct focus modes to suit various shooting scenarios. Single Autofocus (AF-S) is ideal for stationary subjects, locking focus when the shutter button is half-pressed. Continuous Autofocus (AF-C) tracks moving subjects, continuously adjusting focus for sharp results.
For precise control, Manual Focus (MF) allows you to fine-tune focus yourself using the focus ring on the lens. Experiment with each mode to determine which best suits your photographic needs and the specific subject you are capturing. Proper focus mode selection is crucial for image clarity.
Image Quality Settings (Resolution, Compression)
The DSC-H300 allows customization of image quality through resolution and compression settings. Higher resolutions (e.g., 20.1MP) capture more detail, suitable for large prints or cropping. Lower resolutions are efficient for web use or email sharing.
Compression options include Fine, Standard, and Normal. Fine offers the highest quality but largest file sizes, while Normal provides the smallest files with some quality loss. Adjust these settings based on your storage capacity and desired image quality.
ISO Sensitivity
ISO sensitivity adjusts the camera’s light sensitivity, impacting image brightness and noise levels. Lower ISO settings (e.g., 80, 100) are ideal for bright conditions, producing cleaner images. Higher ISO settings (e.g., 800, 1600, 3200) are useful in low light, but introduce more noise or grain.
The DSC-H300 offers an Auto ISO mode for convenient adjustments. Experiment with different ISO levels to find the optimal balance between brightness and image quality for various shooting scenarios.
White Balance
White balance corrects color casts ensuring accurate color reproduction under different lighting conditions. The DSC-H300 provides several white balance presets, including Auto, Daylight, Cloudy, Fluorescent, and Incandescent. Auto white balance generally performs well, but specific presets can improve accuracy in challenging lighting.
Custom white balance allows manual calibration using a white or gray card. Incorrect white balance results in images with unwanted color tints – bluish or yellowish. Experiment to achieve natural-looking colors.

Zoom and Image Stabilization
The DSC-H300 features a powerful 35x optical zoom, complemented by SteadyShot image stabilization. This minimizes blur during handheld shooting, especially at extended zoom ranges.
Optical Zoom Capabilities
The Sony DSC-H300 boasts an impressive 35x optical zoom lens, covering a versatile focal length range of 25-875mm equivalent. This substantial zoom allows photographers to capture distant subjects with clarity, without relying on digital zoom which degrades image quality. The optical zoom provides detailed images, from wide-angle landscapes to tightly framed close-ups of wildlife or sports action. Utilizing optical zoom preserves image resolution, delivering sharper and more detailed photographs compared to digital alternatives. It’s a key feature for versatility in various shooting scenarios.
Digital Zoom Considerations
While the DSC-H300 offers digital zoom functionality, it’s crucial to understand its limitations. Digital zoom essentially crops and enlarges the image, resulting in a loss of detail and potential pixelation. Though convenient for getting even closer to a subject, relying heavily on digital zoom compromises image quality. It’s best used sparingly, or as a last resort when optical zoom isn’t sufficient. Prioritize utilizing the camera’s substantial 35x optical zoom for sharper, more detailed results, minimizing the need for digital enhancement.
SteadyShot Image Stabilization
The Sony DSC-H300 incorporates SteadyShot image stabilization, a vital feature for capturing clear photos and videos, especially at extended zoom levels or in low-light conditions. This technology minimizes blur caused by camera shake, resulting in sharper images. It actively compensates for movement, allowing for handheld shooting with greater confidence. Ensure SteadyShot is enabled within the camera’s settings to maximize image clarity and reduce unwanted motion blur, particularly when utilizing the camera’s powerful zoom capabilities.
Advanced Features
The DSC-H300 offers HDR, Panorama, and Creative Effects, expanding photographic possibilities. DSC technology enhances display compatibility for vibrant, high-resolution visuals.
HDR (High Dynamic Range) Mode
HDR mode on the DSC-H300 captures a wider range of tones, blending multiple exposures for detail in both bright and dark areas. This feature is ideal for scenes with high contrast, like landscapes with bright skies and shadowed foregrounds. Utilizing DSC technology, the resulting images display enhanced clarity and realism on compatible displays. The camera automatically processes these exposures, creating a single image with improved dynamic range, revealing details often lost in standard photography. Remember to use a tripod for optimal results, as HDR mode requires multiple shots.
Panorama Mode
The DSC-H300’s Panorama mode allows you to capture expansive landscapes and scenes by seamlessly stitching together multiple images. Simply press the shutter button and slowly pan the camera horizontally, following the on-screen guidance. The camera automatically combines these images into a single, wide-format panorama; Utilizing DSC display compatibility ensures vibrant and detailed panoramic views. Maintain a consistent speed during panning for best results, and ensure sufficient lighting. This mode is perfect for capturing breathtaking vistas and immersive scenes, creating memorable images.
Creative Effects
The Sony DSC-H300 offers a range of creative effects to enhance your photos beyond standard settings. These include options like Toy Camera, Pop Color, Soft Focus, and Partial Color, allowing artistic expression directly within the camera. Experiment with these effects to instantly transform the mood and style of your images. DSC display technology ensures accurate color representation when viewing these creatively altered photos. Access these effects through the camera’s menu, preview the changes, and capture unique, personalized images with ease.
Troubleshooting Common Issues
Common DSC-H300 problems include power failures, blurry images, and memory card errors. Ensure proper battery charge and card insertion for optimal performance.
Camera Not Turning On
If your DSC-H300 fails to power on, first verify the battery is fully charged and correctly inserted. A minute of black screen upon startup, as reported with DP connections, isn’t typical. Try a different, known-good battery if available. Inspect the battery contacts for any corrosion or debris. Ensure the power switch is firmly in the ‘ON’ position. If still unresponsive, attempt to reset the camera by removing the battery and memory card, then reinserting them after a few minutes.
Image is Blurry
Blurry images with the DSC-H300 often stem from improper focusing or camera shake. Confirm you’ve selected the appropriate focus mode (Single, Continuous, or Manual) for your subject. Utilize SteadyShot image stabilization, especially at higher zoom levels. Ensure sufficient lighting, as low light can exacerbate blur. Clean the lens thoroughly; smudges significantly impact clarity. Check if digital zoom is engaged, as it degrades image quality. A slow startup, like a solid-state drive, can also indicate issues.
Memory Card Errors
DSC-H300 memory card errors can manifest as unreadable cards or inability to save images. First, ensure the card is correctly inserted and compatible with the camera. Try reformatting the card within the camera – this often resolves minor issues. If the error persists, test a different memory card to isolate the problem. A slow startup, similar to a sluggish SSD, might indicate card corruption. Back up any recoverable data before reformatting, and consider a higher-quality card.
LCD Screen Issues
DSC-H300 LCD screen problems can range from dim displays to complete blackouts. Initially, check the brightness settings within the camera’s menu. A one-minute black screen upon startup suggests a potential hardware fault, impacting usability. Ensure sufficient battery power, as low charge can affect display function. If the screen remains unresponsive, try resetting the camera to factory defaults. If issues persist, professional repair may be necessary, as display problems often require specialized attention.

Maintaining Your DSC-H300
Proper care extends the DSC-H300’s lifespan. Regularly clean the lens, manage battery health, and store the camera safely to prevent damage.
Cleaning the Lens
Maintaining a pristine lens is crucial for optimal image quality with your DSC-H300. Use a dedicated lens cleaning kit, including a soft brush to remove loose dust and debris. Follow this with a microfiber cloth lightly moistened with lens cleaning solution.
Avoid harsh chemicals or abrasive materials, as these can damage the lens coating. Gently wipe in a circular motion, starting from the center and moving outwards. Regularly cleaning prevents smudges and ensures clear, sharp photographs. Inspect the lens frequently for fingerprints or dirt accumulation.
Battery Care
Proper battery maintenance extends the life and performance of your DSC-H300’s power source. Avoid completely discharging the battery, as this can reduce its capacity over time. It’s best to charge it when the low battery indicator appears.
Store the battery in a cool, dry place, away from extreme temperatures. Remove the battery if the camera will be unused for an extended period. Use only the supplied charger to prevent damage and ensure optimal charging efficiency.
Storage Recommendations
To safeguard your precious memories, store the DSC-H300 in a dry, dust-free environment. Avoid exposing the camera to direct sunlight or extreme temperatures for prolonged periods. When transporting, utilize a protective case or bag to prevent physical damage.
Regularly back up your images and videos to a computer or external hard drive. Consider using multiple backup locations for redundancy. Keep the memory card in a secure case when not in use, protecting it from static electricity and magnetic fields.

Understanding DSC Technology (Related to Display Compatibility)
DSC (Display Stream Compression) efficiently compresses high-resolution images for transmission, crucial for high refresh rates via HDMI 2.1 and DisplayPort 1.4.
What is DSC (Display Stream Compression)?
DSC, or Display Stream Compression, is a visually lossless compression technology designed to enable higher resolutions and refresh rates over existing display interfaces like HDMI and DisplayPort. It achieves this by reducing the bandwidth requirements of the video signal without significantly impacting perceived image quality. Essentially, DSC allows for the transmission of more data within the same pipe.
This is particularly important for modern displays pushing boundaries with 4K, 5K, and 8K resolutions, alongside high refresh rates like 144Hz or higher. Without DSC, these combinations would often exceed the bandwidth capacity of the connection, leading to visual artifacts or instability. DSC is a key enabler for next-generation display technologies.
HDMI 2.1 and DSC
HDMI 2.1 boasts a significantly increased bandwidth of 48Gbps, offering ample capacity for high-resolution, high-refresh-rate displays; However, even with this improvement, DSC remains crucial for maximizing performance, particularly with demanding setups. While HDMI 2.1 can support many configurations without compression, DSC allows it to handle even more extreme scenarios, like 8K at 60Hz with HDR.
Utilizing DSC with HDMI 2.1 ensures a smoother, more reliable visual experience, preventing potential bandwidth limitations. It’s a synergistic combination, leveraging the increased bandwidth of HDMI 2.1 and the efficiency of DSC for optimal display performance.
DP 1.4 and DSC
DisplayPort 1.4, with its 32.4Gbps bandwidth, often necessitates DSC (Display Stream Compression) for higher resolutions and refresh rates. Unlike HDMI 2.1’s greater capacity, DP 1.4 may struggle with uncompressed 4K at high refresh rates or 8K content. DSC efficiently compresses the signal, enabling these higher specifications without significant visual quality loss.
Employing DSC with DP 1.4 is vital for achieving optimal performance, especially when connecting to advanced displays. It bridges the bandwidth gap, delivering a smooth and responsive visual experience. Without DSC, users might encounter limitations or reduced display capabilities.

Analyzing DSC Curves (Differential Scanning Calorimetry ⎻ unrelated to camera, but a common search term)
DSC curves reveal thermal transitions; exothermic peaks indicate heat release, while endothermic peaks show absorption, identifying melting points and glass transition temperatures.
Identifying Melting Points on DSC Curves
Melting points on DSC curves are visually identified as significant endothermic peaks – downward deflections – representing the energy absorbed during the phase transition from solid to liquid. These peaks demonstrate a temperature where the substance’s structure changes, despite temperature remaining constant during the melting process. The area under the peak correlates to the enthalpy of fusion, indicating the energy required for the transition. Accurate peak identification requires careful baseline correction and consideration of potential overlapping thermal events, ensuring precise melting point determination.
Understanding Exothermic and Endothermic Peaks
DSC curves reveal thermal transitions through peaks. Endothermic peaks, appearing as upward deflections, signify energy absorption – like melting or evaporation – requiring heat input. Conversely, exothermic peaks, shown as downward deflections, indicate energy release – such as crystallization or combustion – generating heat. Peak shape and position reveal transition temperatures and enthalpy changes. Analyzing these peaks, alongside baseline signals, provides crucial insights into material properties and thermal behavior, aiding in comprehensive material characterization.
Interpreting Baseline Signals in DSC Data
DSC baseline signals represent instrumental factors and sample properties unrelated to specific transitions. Accurate baseline subtraction is crucial for precise enthalpy determination. Deviations indicate heat capacity variations or instrument drift. Analyzing baseline shape reveals potential issues like sample misalignment or incomplete purging. Distinguishing between instrumental and sample-related baselines ensures reliable data interpretation. Proper baseline correction enhances the accuracy of thermal analysis, providing a clearer picture of material behavior and transition characteristics.
Checking if DSC is Enabled on Your Computer Display
To verify DSC, right-click the desktop, select “Display Settings” in Windows 10, and check for DSC options within the advanced display properties.
Accessing Display Settings in Windows 10
Navigating to your display settings within Windows 10 is the crucial first step to determine if Display Stream Compression (DSC) is enabled. Begin by right-clicking on any empty space on your desktop background. A context menu will appear; from this menu, select the option labeled “Display settings.” This action will open the Settings app directly to the Display section.
Within the Display settings, you’ll find various options related to your screen configuration. Scroll down to locate “Advanced display settings” and click on it. This will present further options, potentially including details about DSC support and its current status, depending on your hardware and drivers.
Leave a Reply